
Essential First Aid Skills for Survival Situations

Basic First Aid for Survival Situations
Emergencies can strike at any moment, and being equipped with the knowledge and skills for basic first-aid procedures can significantly improve outcomes. The first responder maybe you. Get trained in first aid and be prepared.
This article provides a detailed guide on essential first-aid techniques to help individuals respond effectively in various emergencies.
Did You Know?
In the United States, someone has a heart attack every 40 seconds. CPR can help to save a victim’s life.
What is First Aid?
First aid is the immediate care given to someone suffering from a minor or severe illness or injury to preserve life, prevent the condition from worsening, or promote recovery. It includes simple medical techniques that can be performed with rudimentary equipment or even hands. First aid is a crucial skill everyone can learn, as it can make a significant difference in emergencies before professional medical help arrives.
Understanding the Basics
At the heart of first aid lies the golden trio: Airway, Breathing, and Circulation (ABCs), a simple yet potent reminder of the priorities in emergency care.
We unravel the mysteries behind assessing situations rapidly and accurately, setting the stage for effective intervention.
Immediate Response to Common Injuries and Conditions
Here are essential first aid techniques for everyday emergencies, including wound care, burn treatment, handling sprains and strains, choking aid, and CPR steps.
It emphasizes quick, practical actions to stabilize and assist the injured before medical help arrives.
Managing Minor Wounds and Abrasions
Effective management is critical to preventing infection and promoting swift healing in the crucial moments following a minor wound or abrasion. This expanded guide dives deeper into the essential steps of cleaning and dressing cuts, ensuring that even those with minimal first aid knowledge can confidently administer care.
Step 1: Hand Hygiene
Before touching the wound or the area around it, thoroughly wash your hands with soap and water. This step is paramount to prevent the introduction of bacteria or other pathogens into the wound, which could lead to infection. If soap and water are unavailable, use an alcohol-based hand sanitizer.
Step 2: Stopping the Bleeding
Press a clean cloth, gauze, or bandage against the wound to control bleeding. It’s crucial to apply enough pressure to stop or slow the blood flow without causing further pain or damage to the wound. If the bleeding is profuse, keep the pressure constant for a few minutes until it diminishes.
Step 3: Cleaning the Wound
Rinse the wound thoroughly under cool, running water to remove any debris, dirt, or particles that could lead to infection. Avoid using hydrogen peroxide or alcohol, which can irritate the wound and delay healing. For wounds with embedded debris, gently tweezing it out after rinsing may be necessary. However, if the debris is deeply embedded, seek professional medical assistance.
Step 4: Applying Antibiotic Ointment
Once the wound is clean, apply a thin layer of antibiotic ointment. This step not only prevents infection but also keeps the wound moist, which can promote the healing process. Be cautious to use only a tiny amount to avoid any potential allergic reaction or irritation that could hinder recovery.
Step 5: Dressing the Wound
Cover the wound with a sterile bandage or dressing, ensuring it’s large enough to cover the entire area securely. The dressing should be snug but not so tight that it impedes circulation. Change the dressing daily or whenever it becomes wet or dirty to maintain a clean environment conducive to healing.
Additional Tips:
- Monitor the wound for signs of infection, such as increased redness, swelling, warmth, or pus discharge. If any of these symptoms occur, seek medical attention.
- If the wound is on a limb, keep the limb elevated when possible to reduce swelling and encourage blood flow from the injury site.
- Ensure your tetanus vaccination is up to date, especially if a rusty or dirty object causes the wound.

Handling Burns
Handling burns promptly and effectively is crucial to minimize damage and enhance healing.
Burn Degree Levels and First Aid Treatment Procedures
Burns vary in severity from the first degree, affecting only the outer skin and being treated with cooling and moisturizing, to the second degree, which includes more serious damage with blisters and requires water cooling and sterile bandaging. The most severe, third-degree burns penetrate all skin layers and need immediate medical attention, avoiding home treatment or clothing removal.
- First-Degree Burns: Affect only the outer skin layer. Treat with cool water, then moisturize. Cover if needed.
- Second-Degree Burns: Involve the first and second skin layers, causing blisters. Cool underwater, use a sterile bandage, and don’t pop blisters.
- Third-Degree Burns: Penetrate all skin layers, possibly damaging tissues. Requires medical attention; do not apply home remedies or remove adhered clothing.
Here’s a focused approach to managing first-degree and minor second-degree burns to offer immediate relief and prevent complications.
Cooling the Burn
Immediately cool the burn by running it under cool, not cold, water for at least 10 minutes. This step reduces the skin’s temperature, lessens pain, and decreases swelling by removing heat from the burn site. Avoid ice or icy water, as these can cause further tissue damage.
Protecting the Burn Area
After cooling, gently dry the area and cover it with a sterile, non-adhesive bandage or a soft cloth. This protection layer helps prevent infection and keeps the burn clean. It also shields the burn from air, which can exacerbate pain. Ensure the bandage is loosely applied to avoid putting pressure on the burn.
Avoiding Blisters and Ice
Do not pop any blisters that form, as they provide a natural barrier against infection. Breaking them open can lead to bacteria entering the wound and increasing the infection risk. Similarly, direct application of ice can cause further skin damage and should be avoided.
Pain Management
Burns can be quite painful due to nerve damage. To help manage the discomfort, take over-the-counter pain relievers like ibuprofen, acetaminophen, or aspirin. These medications can also help reduce inflammation around the burn area.
Additional Care Tips:
- Keep the burn elevated to reduce swelling and discomfort.
- Watch for signs of infection, such as increased redness, swelling, warmth, or oozing, necessitating medical attention.
- Avoid applying butter, oils, or home remedies to the burn, as they can trap heat and worsen the injury.
- If the burn is extensive, affects sensitive areas (like the face, hands, feet, or genitals), or if you have any concerns about its severity, seek medical evaluation promptly.
Sprains and Strains
Managing sprains and strains effectively is vital for quick recovery and to prevent further damage. These common injuries involve the ligaments and muscles and require timely and appropriate care. Here’s a detailed guide to the immediate care for muscular injuries.
Rest the Injured Area
Immediate rest is crucial to prevent further injury. Avoid putting weight or pressure on the affected area. This step helps minimize additional strain and allows the healing process to begin. Use supports or splints if necessary to immobilize the region, especially in the case of severe sprains or strains.
Apply Ice Correctly
Ice application is essential to reduce swelling and alleviate pain. Wrap ice or a cold pack in a thin cloth to prevent direct contact with the skin, which can cause frostbite. Apply the wrapped ice to the injured area for 20 minutes every 2 hours during the initial 48 hours post-injury. This cold therapy helps to constrict blood vessels, reducing blood flow to the area and thus swelling and inflammation.
Compression to Reduce Swelling
Applying compression with a bandage or compression wrap helps to reduce swelling further and provides support to the injured area. Wrap the area snugly but not so tight as to cut off circulation. Begin wrapping from the end farthest from your heart and move towards your body, which helps to reduce fluid accumulation in the injured area.
Elevate the Injured Part
Elevating the injured area above the heart level helps reduce swelling by promoting venous return—the return of blood flow to the heart. Use pillows or another support to comfortably elevate the area, especially when sitting or lying down. This elevation is most effective when done continuously for the first 24 to 48 hours after the injury.
Additional First Aid Tips:
- Monitor the injury for signs of severe damage, such as an inability to bear weight, deformity, or extreme swelling, which require medical evaluation.
- After the initial 48 hours, consider gentle, gradual movement to prevent stiffness, as long as it doesn’t cause pain.
- Avoid heat, alcohol, and massage in the early stages, as these can increase swelling and bleeding.
Choking First Aid
Providing immediate and effective first aid for choking is crucial, as it can be a life-threatening situation. Here’s an expanded guide on responding when an adult or child is choking, focusing on the Heimlich maneuver, a widely recognized technique for dislodging an object from a person’s airway.
Step 1: Confirm the Choking Incident
First, it’s essential to confirm that the person is indeed choking. Ask, “Are you choking?” These are clear signs of choking if the person cannot speak or breathe or is making apparent efforts to cough without success. Look for the universal choking sign: hands clutched to the throat.
Step 2: Get into Position
If the person is standing, stand behind them. For a child, you may need to kneel to get to their level. Wrap your arms around the person’s waist. This position is preparatory for applying the necessary force to dislodge the object from the airway.
Step 3: Make a Fist and Apply Thrusts
With one hand, make a fist and place it just above the person’s navel, well below the ribcage. This is a critical placement, as pressing into the wrong area could cause injury. Cover your fist with your other hand to ensure a firm grip. Then, perform quick, upward thrusts into the abdomen. These thrusts increase the pressure in the airway and can help dislodge the object.
Performing the Heimlich Maneuver on Different Age Groups
- For Adults and Children Over 1 Year: Follow the standard procedure described above. Ensure your thrusts are inward and upward, aiming to increase the pressure behind the blockage to force it out.
- For Infants (Under 1 Year): Do NOT use the Heimlich maneuver. Instead, place the infant face down along your forearm, support their head, and give five firm back blows between their shoulder blades with the heel of your hand. If unsuccessful, turn the infant face up and give five chest thrusts using two fingers placed in the center of the chest. Alternate back blows and chest thrusts until the object is dislodged or the infant starts to breathe or cough.
Aftercare
Once the object is dislodged and the person can breathe again, it’s still important to seek medical attention to ensure no residual damage or remaining obstruction. In cases where you cannot dislodge the object and the person becomes unconscious, begin CPR immediately and continue until medical help arrives.
Additional Tips:
- Stay calm and act quickly. Panic can worsen the situation.
- If you’re alone and choking, you can perform the Heimlich maneuver on yourself by using a sturdy object, such as a chair, to press into your abdomen with a quick thrust upward.
- Regularly updating your first aid knowledge and practicing these techniques can prepare you to act effectively in real-life situations.

CPR (Cardiopulmonary Resuscitation)
Cardiopulmonary Resuscitation (CPR) is a lifesaving technique used in emergencies where someone’s breathing or heartbeat has stopped. Here’s an expanded guide on CPR on adults, which could be crucial in saving a life before professional medical help arrives.
Step 1: Safety and Responsiveness
First, ensure that the environment around the victim is safe for you and them. Then, check for responsiveness by gently shaking the victim’s shoulders and asking loudly, “Are you okay?” If there’s no response, proceed with CPR.
Step 2: Call for Help
Immediately call emergency services or direct someone else to make the call. Provide clear information about the situation and your location. Time is critical in cardiac emergencies, and professional help should come as you perform CPR.
Step 3: Position Your Hands
Kneel beside the victim and place the heel of one hand on the center of the chest, right between the nipples. Place your other hand on top of the first and interlock your fingers. Ensure your shoulders are directly above your hands and your arms are straight to apply the proper force.
Step 4: Chest Compressions
Use your body weight to press down hard and fast on the chest at a depth of about 2 inches (5 cm) for adults. The rate should be approximately 100 to 120 compressions per minute, which matches the beat of the song “Stayin’ Alive” by the Bee Gees, often recommended as a guide. After each compression, allow the chest to return to its original position. This action helps the heart pump blood to the body and is critical in maintaining circulation.
Additional Tips and Information:
- Breaths: After every 30 compressions, give two rescue breaths if you are trained in CPR. Tilt the victim’s head slightly, lift the chin, pinch the nose shut, and breathe into the mouth for about one second, ensuring the chest rises. If you’re uncomfortable or trained to give rescue breaths, continue with chest compressions only.
- No Interruptions: Minimize interruptions in chest compressions. Continue CPR until there are signs of movement, emergency medical services take over, or the scene becomes unsafe.
- AED Use: If an Automated External Defibrillator (AED) is available, follow the device’s spoken instructions as soon as possible. CPR and AED use significantly increase the chances of survival after cardiac arrest.
Performing CPR on an adult involves quick assessment, calling for help, and executing chest compressions with the correct technique. Following these steps, you can provide essential aid that might keep a person alive until professional medical services arrive.
Remember, the primary goal of CPR is to maintain blood flow to the brain and heart, buying precious time in a cardiac emergency.
Regular training and refreshers in CPR techniques are highly recommended to ensure effectiveness and confidence in real-life situations.
Stroke Recognition
Recognizing a stroke quickly can significantly impact the outcome for the person affected. The FAST method is a simple and effective way to remember how to check for signs of a stroke and emphasizes the importance of timely action. Here’s an expanded explanation of each step in the FAST method for stroke recognition.
Face Drooping (F)
Ask the person to smile and observe their face. In the case of a stroke, one side of the face may droop or show less movement compared to the other. This asymmetry indicates that the person might be experiencing a stroke, as strokes often affect one side of the body.
Arm Weakness (A)
Request the person to raise both arms and keep them lifted. Look for any signs of weakness or numbness. One arm drifting downward or unable to raise one arm indicates muscle weakness or paralysis on one side of the body, another common stroke symptom.
Speech Difficulty (S)
Ask the person to repeat simple sentences like “The sky is blue“ or “I love cats.” Slurred speech, trouble forming words, or strange patterns can signify a stroke. The person might understand what you’re asking but cannot verbalize their response correctly.
Time to Call Emergency Services (T)
If you observe any of these signs, even if they seem to fluctuate or disappear, it’s critical to call emergency services immediately. Note when the first symptoms appeared, as it can be crucial information for medical professionals. The treatment for a stroke often depends on how quickly the person receives medical attention; there’s a narrow window for effective intervention that can reduce long-term disability.
Additional Information:
- Beyond FAST: Other symptoms may include sudden numbness, confusion, trouble seeing in one or both eyes, difficulty walking, dizziness, loss of balance, or severe headache with no known cause. Be alert to these signs as well.
- Immediate Action: Do not wait to see if the symptoms go away. Immediate medical treatment is necessary to help reduce the damage caused by a stroke.
- Do Not Drive: Do not drive the person to the hospital unless necessary. Ambulance personnel can provide critical care en route.
The FAST method is a quick and straightforward way to recognize the potential signs of a stroke. By taking immediate action and calling for emergency medical assistance, you can play a vital role in helping reduce the impact of a stroke. Awareness and prompt response are essential to improving the chances of recovery for someone experiencing a stroke.

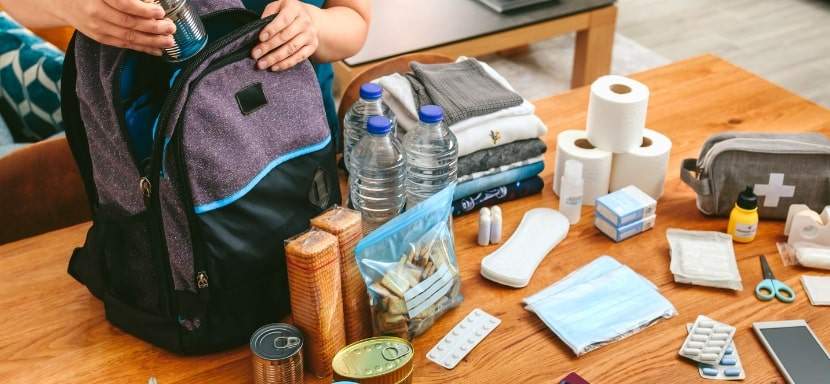
Building a First Aid Kit
A comprehensive first aid kit is foundational to effective emergency response in both the home and workplace. Equipping yourself with the right tools and knowledge can make a significant difference in managing accidents and health emergencies.
Here’s an expanded guide on building a first aid kit and the importance of learning and practicing first aid skills.
Building a Well-Stocked First Aid Kit
Essential Items:
- Sterile Gauze Pads and Bandages are for covering and protecting wounds, controlling bleeding, and preventing infection. They include various sizes to accommodate different injuries.
- Adhesive Tape: To secure bandages and gauze in place, ensuring wounds are covered and healing is uninterrupted.
- Antiseptic Wipes: For cleaning around wounds and reducing the risk of infection. They are gentle on the skin and effective in sanitizing.
- Antibiotic Ointment: Promotes healing and prevents infections in minor cuts, scrapes, and burns by inhibiting bacterial growth.
- Pain Relievers include ibuprofen, acetaminophen, or aspirin to manage pain and reduce inflammation. Include a variety for different needs and allergies.
- Scissors and Tweezers: Scissors are used for cutting tape, gauze, or clothing, and tweezers are used to remove debris or splinters from wounds.
- Disposable Gloves: To protect both the caregiver and the patient from infection. Always use gloves when treating wounds or coming into contact with bodily fluids.
- CPR Face Shield: A barrier device used during CPR to prevent direct contact with the patient’s mouth and nose, reducing the risk of disease transmission.
Additional Recommendations:
- Thermometer: To check for fever, an essential symptom in many health conditions.
- Elastic Bandages: These are used to wrap sprains or strains, provide support, and reduce swelling.
- Cold Packs: Instant cold packs for reducing swelling and numbing pain, handy for injuries like sprains or heat-related conditions.
- Allergy Medication: Including antihistamines for allergic reactions.
- Burn Gel: Specifically formulated for burn relief, helping to cool and soothe minor burns.
- Instruction Booklet: A guide on basic first aid procedures can be invaluable in an emergency.
Learning and Practice
- Regular First Aid Training: Conducting certified first aid courses ensures you are current with the latest techniques and recommendations. It also builds confidence to respond effectively in emergencies.
- Refreshers: First aid practices and guidelines can evolve; regular refreshers keep your skills sharp and knowledge current.
- Practical Application: Hands-on practice during training helps cement the knowledge and skills, making recalling and applying them easier during an emergency.
- Community Awareness: Encouraging family members, colleagues, and community members to learn first aid creates a safer environment for everyone.
Building a comprehensive first aid kit and regularly updating your knowledge are essential steps in preparing for and effectively handling emergencies.
By ensuring you have the necessary supplies and skills, you’re well-equipped to provide immediate and effective care, potentially saving lives and minimizing the severity of injuries.
Empowering Life-Saving Actions Through First Aid Preparedness
Mastering basic first aid techniques is a cornerstone of personal and community health safety. This guide has meticulously detailed the critical steps for responding to joint injuries and health emergencies—from managing minor wounds and burns to addressing more severe conditions like choking and stroke symptoms. The essence of this instruction is not merely to impart knowledge but to instill a profound sense of confidence and competence within individuals. Such empowerment is invaluable, as it transforms ordinary citizens into potential life-savers.
The importance of regular practice and the continuous updating of both first aid kits and skills cannot be overstated. Emergencies are unpredictable, and the readiness to act swiftly and effectively can significantly alter outcomes. A well-stocked first aid kit, complemented by the knowledge of how to use its contents effectively, is akin to a beacon of hope in moments of crisis.
Engaging with these basic first aid procedures and ensuring the availability of essential supplies are proactive measures that echo the adage, “Preparation is the key to success.” It’s about nurturing a culture of safety and responsiveness within homes, workplaces, and broader communities. When individuals are equipped to respond to emergencies, the collective well-being of society is bolstered.
In conclusion, embracing first aid preparedness is a testament to the value we place on life and health. It’s a commitment to being part of a vigilant network ready to offer a helping hand when faced with health emergencies. This guide is a resource to foster that readiness, encouraging everyone to take those vital steps toward becoming adept at first aid. Doing so contributes significantly to creating a safer environment, essentially making the world a better place, one prepared individual at a time.
Exciting Facts About Survival First Aid
This compilation of facts emphasizes the critical role of first aid knowledge and skills in enhancing safety and providing effective emergency response. Understanding and applying first aid can significantly impact the outcome of health emergencies, underscoring the importance of widespread first aid education and preparedness.
- Saves Lives: Knowledge of first aid can differentiate between life and death in emergencies.
- Reduces Recovery Time: Prompt and effective first aid can speed up the recovery process and decrease the duration of hospital stays.
- Prevents Situations from Worsening: Proper first aid can prevent injuries from becoming more severe and reduce the risk of infection.
- Increases Patient Comfort: Even when injuries are not life-threatening, first aid can help reduce pain and anxiety for the affected person.
- Improves Safety Awareness: Learning first aid increases safety awareness, prompting individuals and organizations to implement preventive measures.
- Essential in Disaster Situations: In natural disasters or accidents involving multiple people, professional medical help may be delayed. First aid knowledge is crucial in these scenarios.
- Required by Law for Businesses: In many countries, it’s a legal requirement for workplaces to have a certain number of staff trained in first aid.
- Empowers Individuals: Knowing how to administer first aid allows individuals to act in emergencies rather than feeling helpless.
- Promotes Safe and Healthy Living: First aid education often includes information on healthy living and disease prevention.
- Community Impact: Communities with more first-aid-trained individuals have better emergency response capabilities.

More Survival Tips and Advice
How to Protect Yourself From Insects in the Wild
There’s nothing like being out in the wild—birdsong echoing through the trees, the fresh scent of earth, and a deep sense of peace that makes you think, “Ah, this is what life is about.” But then comes the buzzing. Mosquitoes, ticks, and flies swoop in like uninvited...

How to Identify Poisonous Plants
Exploring the great outdoors can be incredibly refreshing, offering a chance to reconnect with nature and unwind from daily stresses. However, it also comes with its fair share of risks. Chief among them? Poisonous plants. These hidden hazards can turn a peaceful...
How to Use the Sun to Tell Time
Using the sun to tell time sounds like a Robinson Crusoe novel. Imagine being stranded on a desert island with no phone, clock, or sundial. You'd still have one incredibly reliable resource: the sun. It’s been doing its thing for billions of years, and by the looks of...
How to Purify Water Using Boiling
When you're miles away from civilization, lost in the wilderness, or don't trust what's coming out of your tap, the idea of pure, clean drinking water starts to sound like a mythical oasis. Maybe it's all those survival shows you've binged, but suddenly, you're eyeing...

How to Build a Faraday Cage
Have you ever had one of those moments when your phone seems to be on its own personal field trip through Wi-Fi signals, Bluetooth, and all kinds of electromagnetic noise? Well, I have. The endless hum of invisible waves flying through the air makes you wonder—how can...
More Survival Scenarios

How to Survive a Layoff
When the Floor Falls Out: The Reality of a Layoff Layoffs feel personal—even when they're not. One day, you're responding to Slack messages and forwarding emails. Next, you're staring at your monitor as it logs you out... for good. Whether it's a restructuring, a...

How to Survive a Drug Test
The Cup, The Room, The Truth I never imagined I’d be so emotionally invested in a paper cup. But there I was, standing under the fluorescent hum of a strip-mall clinic, trying to recall the last time I ate a poppy seed bagel. That’s the thing about drug tests—they...

How to Survive an Interrogation
If you've ever been caught in the crosshairs of an overly enthusiastic mall cop or stared down by someone in a uniform with a clipboard and a glare, you’ve felt it — the chilly fingers of interrogation anxiety. And while most of us imagine interrogation scenes as...

How to Survive a Nightclub Shooting
Nightclubs pulse with life—lights flashing, music pounding, bodies packed tight on the dance floor. It’s a place to escape, feel the rhythm, and lose yourself in the crowd. But that same energy can turn deadly in seconds, transforming a night of fun into one of the...

How to Survive a Bachelor Party
A bachelor party is a delicate mix of celebration, chaos, and questionable decision-making, wrapped in the noble intention of sending the groom off into married life with a night he’ll (hopefully) remember. It’s a ritual as old as time—well, as old as men deciding...

How to Survive Your First Time at the Gym
Walking into a gym for the first time can feel like stepping into an alien world. The machines hum with purpose, the regulars move confidently, and you’re left standing there, clutching your water bottle, wondering whether you’re in the right place—or on the right...

How to Survive a Worldwide Communications Breakdown
Imagine waking up to silence. Your phone doesn’t buzz, your email won’t load, and even your local radio station crackles with static. A worldwide communications breakdown has hit. What next? For many, this doomsday scenario may sound like the opening lines of a...
How to Survive a Flash Flood While Driving
Surviving a flash flood while driving requires quick thinking, calmness, and a solid plan to ensure your safety. Preparation can make all the difference between a close call and a catastrophe in emergencies like this. This guide provides practical advice to protect...
How to Build an Emergency Kit
Emergencies don’t knock politely at the door. They barge in, uninvited, like a distant relative with a penchant for drama, turning your world upside down without warning. Whether it’s a power outage, a natural disaster, or an unexpected evacuation, the key to staying...
How to Protect Yourself From Insects in the Wild
There’s nothing like being out in the wild—birdsong echoing through the trees, the fresh scent of earth, and a deep sense of peace that makes you think, “Ah, this is what life is about.” But then comes the buzzing. Mosquitoes, ticks, and flies swoop in like uninvited...